Configuring SSL in SimpleHelp
In order for customers to be able to visit your SimpleHelp server over https:// a valid SSL certificate should be installed. This guide details how you can upload an existing SSL certificate to SimpleHelp, or create a new certificate to use.
When SimpleHelp is first installed, it will create a default self-signed certificate. This self-signed certificate will produce warnings in a web browser that visits your site, and is not recommended for production use. Instead, a trusted certificate issued by a certificate authority should be used. When setting a certificate there are two options:
- Let's Encrypt - recommended if your server is available on port 80. Let's Encrypt certificates can be requested and managed by the SimpleHelp server, at no additional cost.
- Upload an Existing Certificate - SimpleHelp supports a variety of certificates. This is recommended if you already own a certificate for your domain name.
To manage your server's SSL settings follow these steps:
- log into the Technician Console as a server administrator
- switch to the Administration tab
- select the Network Settings section.
- locate the HTTS / SSL section shown below.

You can alter your server's certificate settings by using the Set a SSL Certificate button.
Let's Encrypt SSL Certificates
Let's Encrypt SSL Certificates are free short duration SSL certificates that typically last 90 days. The SimpleHelp server is able to request, download and install these certificates with minimal configuration required. Additionally, the server will automatically renew the certificates after approximately 60 days.
NOTE: It is only possible to configure a Let's Encrypt Certificate on servers that are publicly accessible on port 80. Let's Encrypt servers will verify the domain name of your SimpleHelp server over port 80, so your SimpleHelp server must be available on this port to process the requests.
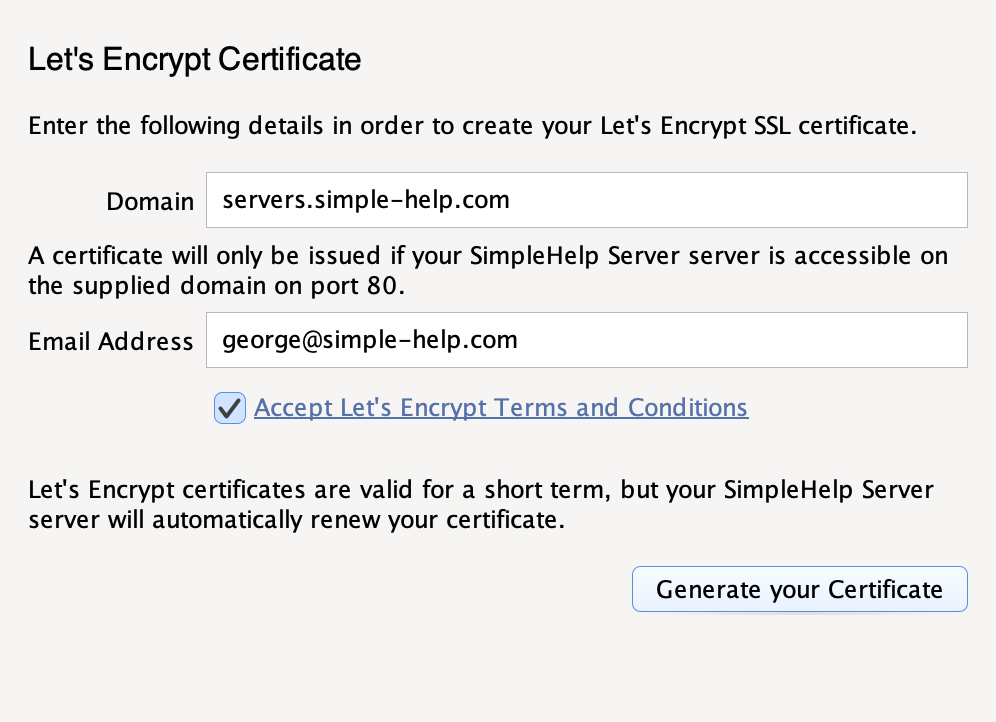
Let's Encrypt Certificates can automatically be generated by SimpleHelp for any server that is publicly accessible on port 80. When creating a Let's Encrypt certificate you will be presented with the following configuration:

| X | X |
|---|---|
| Domain | The domain name of your SimpleHelp server. This should not include the server ports or any protocols.. |
| Email Address | The email address of your server administrator. |
If your SimpleHelp server is accessible on multiple domain names then you can generate certificates for each of these by specifying them as a comma-separated list:
domain1.simple-help.com,domain2.simple-help.com,domain3.simple-help.com
Let's Encrypt will validate the domain name entered, so it must match the address of the SimpleHelp server, and must be publicly accessible on port 80. Additionally, the email address will be used to notify you when your certificate is due to expire. Since certificates are free they are valid for a short period. Once a Let's Encrypt certificate has been set up SimpleHelp will automatically renew the certificate for you after 60 days.
Using an Existing SSL Certificate
SimpleHelp supports three ways in which you can use an existing SSL certificate.
- Certificate and key upload
- Load Certificates from a directory on the server
- Upload the certificates and key bundled in a single certificate store.
A valid certificate must include a private key, and all intermediate certificates that lead to a trusted root. The intermediate certificates create a link between the trusted root and your certificate, so a browser knows to trust your certificate if it trusts the root certificate.
Certificate and Key Upload
If your certificate authority issues a private key and certificate to you then you can upload these directly into SimpleHelp. Three files can be provided:
| X | X |
|---|---|
| Private Key | The file containing your certificate's private key, usually in PKCS8 format. |
| Certificate | The certificate file, usually in PEM format. |
| Chain Certificates | One or more intermediate certificates. |
SimpleHelp will attempt to load the private key, and verify that the Certificate and Chain Certificates lead to a trusted root certificate. If successful, the certificate will be applied and used immediately.
Load Certificates from the Server
If your certificate files are located on the SimpleHelp server already, you can instruct SimpleHelp to load them. SimpleHelp will load the certificates, and will reload them when they change on disk. This is particularly useful when using third party utilities to manage your SSL certificates, such as acme.sh.
To start, specify the directory on the server that SimpleHelp should load certificates from. For example, specifying:
/etc/letsencrypt/live/servers.simple-help.com
will instruct SimpleHelp to load the private key, certificate and intermediate certificates from the servers.simple-help.com directory. If successful, the certificate is automatically applied and immediately activated.
NOTE: If there are intermediate or root certificates missing the SSL status may appear fine in your browser, but SimpleHelp applications will continue to not load over SSL until this is rectified.
Upload a Certificate Store
If you have an existing certificate store you can upload this directly into SimpleHelp. SimpleHelp supports PKCS12 / PFX stores, as well as the legacy Java Keystore (JKS) format. When uploading your store ensure the following:
- the uploaded store must contain the certificate and associated private key
- the uploaded store must contain any required intermediate certificates
SimpleHelp will load and verify the keystore, and apply the certificate automatically.
NOTE: If there are intermediate or root certificates missing the SSL status may appear fine in your browser, but SimpleHelp applications will continue to not load over SSL until this is rectified.
Viewing the Keystore Details
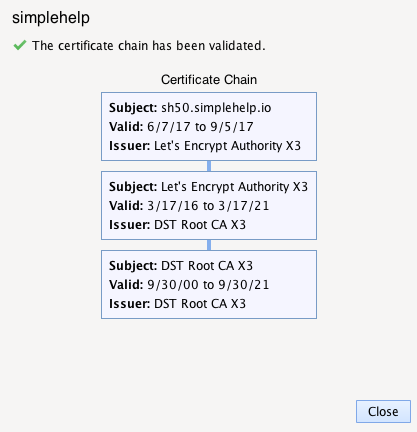
Clicking the button View Server Keystore Details will request the current keystore details from the SimpleHelp server and will notify you whether the certificate chain is valid. If it is valid, each certificate in the chain will be listed, as follows:

Testing your SSL Store
Once you upload an SSL store to SimpleHelp, you can test that the correct certificates have been included in the bundle. We suggest using the website:
https://www.digicert.com/help/
which will let you know if the certificate chain is complete or not.
Using IIS Certificates
If you have an SSL certificate installed on Windows then it is possible to export the certificate and complete chain using these steps:
- Run the command mmc to open the Management Console.
- Select File > Add / Remove Snap-In
- Locate the Certificates snap-in and add it.
- Select Computer Account > Local Computer and press Finish.
- In the Certificates snap in, expand the tree and locate the Personal folder. Expand the Certificates folder below.
- Right-click on your certificate and choose ALL TASKS > Export.
- If prompted, choose to export the private key and to include all certificates in the certificate chain (do not choose to delete the private key). Additionally, select TripleDES-SHA1 as the Encryption option.
- You will then be given the option to save a .pfx SSL store.
You can then upload the .pfx directly into SimpleHelp.
Using Apache Certificates
Apache uses the following SSL certificate settings:
SSLCertificateFile - the path to your SSL certificate file. This file may also contain the certificate key.
SSLCertificateKeyFile - the path to your SSL certificate private key file. The private key may be contained in the SSLCertificateFile.
SSLCertificateChainFile - the concatenation of PEM encoded certificates which form the certificate chain (the intermediate and root certificates).
Your certificate chain file should include your intermediate certificates and root certificate all appended together. To create a keystore using these files you will need to use openssl:
openssl pkcs12 -export -in SSLCertificateFile -inkey SSLCertificateKeyFile -out store.p12 -name simplehelp -CAfile SSLCertificateChainFile -caname root -chain
If you receive the error message Error unable to get issuer certificate getting chain then this indicates that openssl was not able to create a complete certificate chain. Make sure that all intermediate and root certificates are concatenated together in the file SSLCertificateChainFile.
Ciphers and Protocols
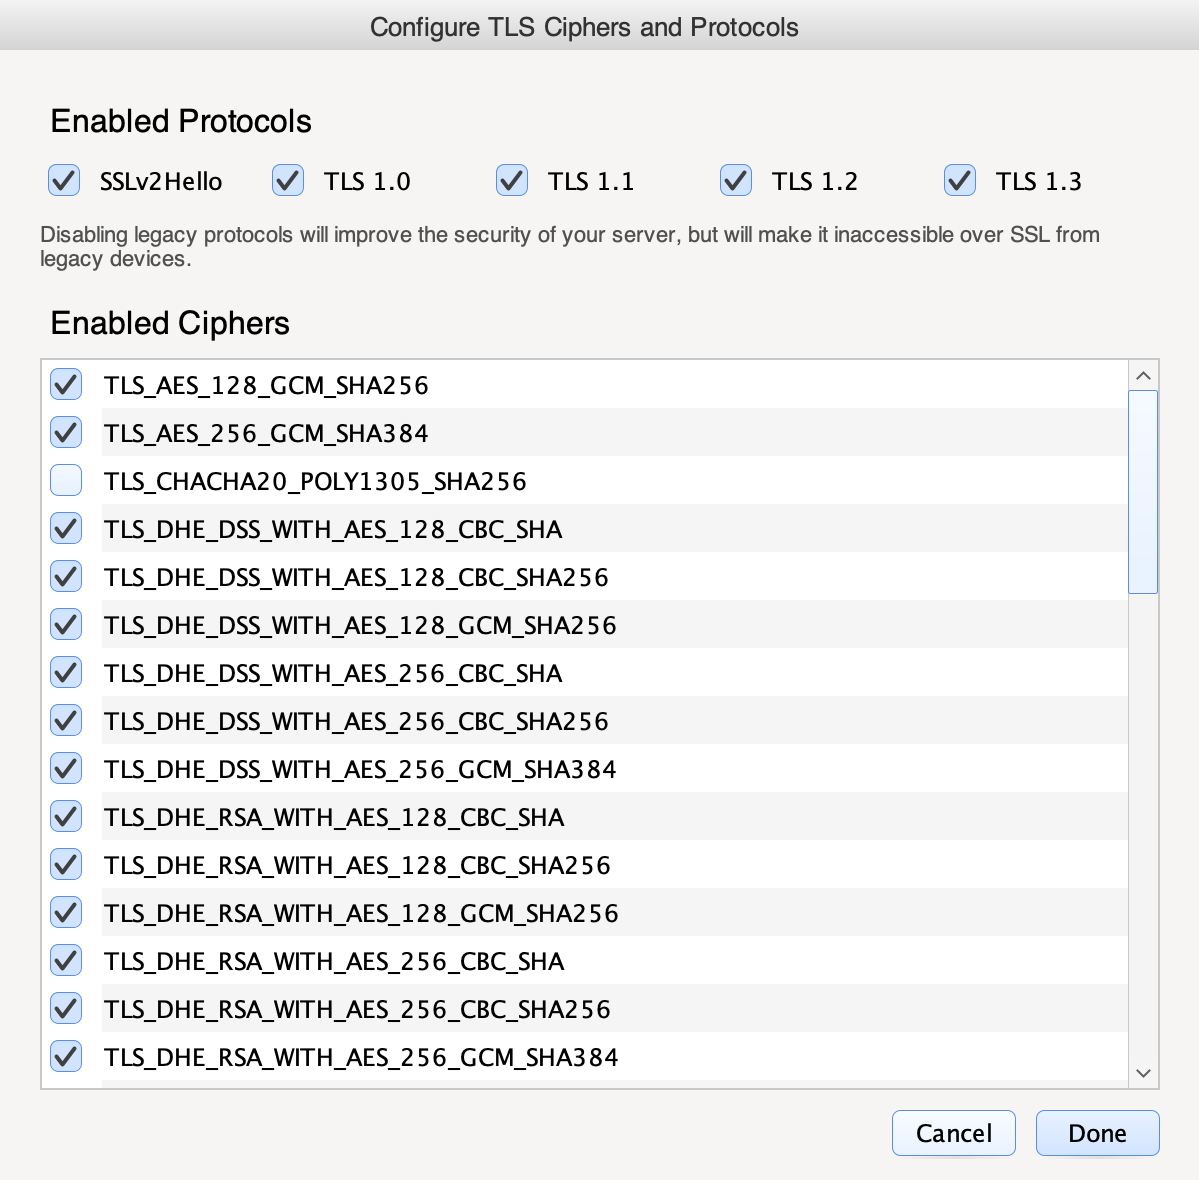
The set of enabled ciphers and protocols that the SimpleHelp server accepts can be configured. By restricting the ciphers and protocols you can control how clients communicate with the SimpleHelp server over SSL / TLS.
To configure the Ciphers and Protocols click on the Advanced Configuration button, which will present the following dialog:

The optimal configuration for your server will depend on the devices you wish to support. Older operating systems and browsers will be limited in the ciphers and protocols that they support. By restricting the SimpleHelp server you will increase the security of secure communications but will prevent certain devices from connecting.

